LINE YOUR PUTT
HIGH SCHOOL :
S1.H1.L1
S2.H5.L2
S4.H3.L1
MIDDLE SCHOOL :
S1.M18.8
S4.M3.8
S4.M5.6
ELEMENTARY:
S1.E15.5b
S2.E3.5c
S4.E1.3
S4.E3.K
In this lesson, the student will learn to:
- Stay on task
- Understand a basic putting motion
- Demonstrate proper body alignment throughout the putting motion
- Detect and correct errors
- Explain how appropriate practice improves performance
MATERIALS
- 4 targets or 1 per 5-10 students
- 5 discs (putters) per target
- Cones or markers for line designation
SET-UP
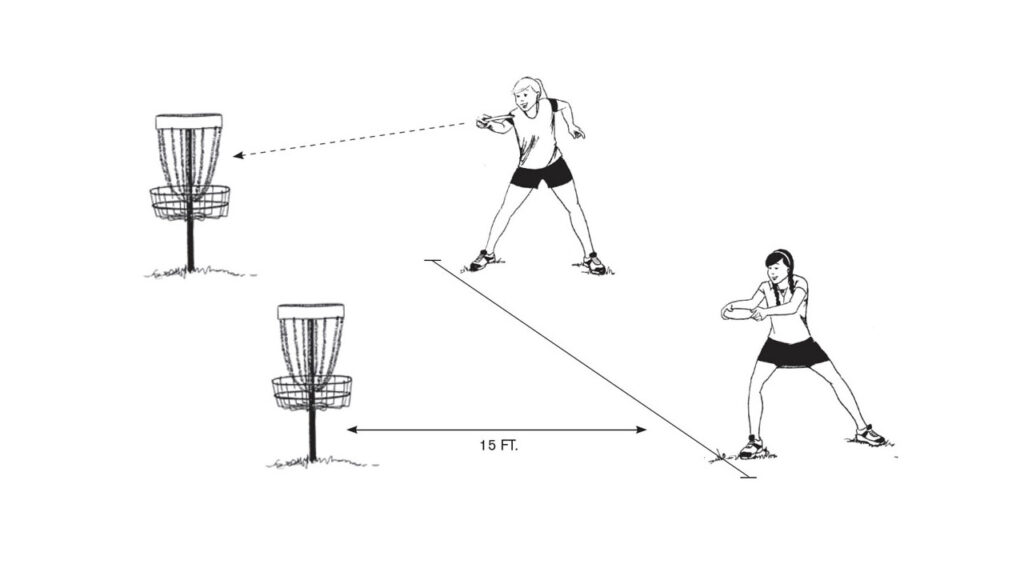
- Place targets in a line equally spaced apart about 15’ from each other
- Mark putting lines at 15, 20, and 25 feet for MS and HS (10 and 15 to start for ES)
- Divide the class equally among the targets
OBJECTIVE
Line Your Putt is the core putting lesson for immediate feedback and multiple repetitions within a small group setting. The distances can be adjusted for the individual student learning level and teachers will have the ability for direct feedback and assistance with the entire class in a small area.
HOW TO PLAY
Introduction: (5 minutes)
The first student will stand behind the first prescribed mark with one putter in hand. Have the second person in line along with the other students move back to the second spot. The second person in line or next to go will be the “disc feeder”. They will hand/feed the next disc to the student that is currently putting. The sequence continues until all putts have been attempted. The putting student will then gather up the discs and hand them to the new second in line.
Please review good putting habits and that it is better to take more time and execute the putt the student is visualizing.
Lesson: (15-20 minutes)
- Each group forms a single line per target. Lines marked on the gym floor or field help maintain order and distance. Students attempt three to five putts from the prescribed distance. Allow the putter as much room as needed to extend through the putting motion.
- Multiple putts allow students the opportunity to adjust and begin to see and feel a successful putt. The instructor is able to spend time between groups, checking forms, and helping with techniques. Different putting stances, styles, and distances may be introduced when the line cycles back to the beginning. Putting variations keep students on task for longer durations.
- For more repetitions or larger groups, break each target’s larger line into two smaller ones that run simultaneously left and right of each marker per target. Stress the importance that no one retrieves their discs until both students putting at the same target are finished. Six to Ten discs per target are needed for this variation.
Culminating Activity: (10-15 minutes)
See Line Your Putt Relay for the perfect lesson team game
Putting style suggestions:
- Freestyle (any way you want)
- In-Line Stance
- Straddle Stance
The key points to observe include:
- Lead foot pointed at target and hips squared to the target
- Weight transfer from back to forth.
- Putting arm is a natural extension of the body and weight transfer.
- Aim at the sweet spot: right of pole for Righties and left of pole for Lefties.
- Extension and follow through towards the target.
Elementary Grades
- Shorten the distance marks to suit the age and experience of your students.
- Beginning ES students often have more success turning to the side and pulling the putt from the side and following through to the target.
VIDEO COMING SOON

