Putting is the most important component of disc golf. Most people have heard the golf adage, “Drive for show, putt for dough”. This statement holds true for the game of disc golf. It does a player no good to be able to drive the hole and fail to make the putt. The ability to be consistent with “short range” putts, clutch pressure putts, and with some frequency, throw in longer range putts will directly transfer into saved strokes. A beginning player that learns proper putting technique gains a greater sense of satisfaction and enjoyment of the game. Putting forms and routines are highly specialized to the player yet all are grounded in putting fundamentals.
GRIPS. STANCES. STYLES.
GRIPS
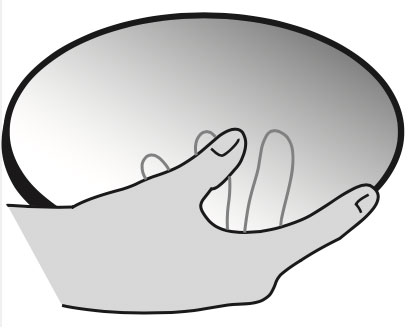
CONTROL GRIP
The most widely used grip for putting.
- Disc rim rests into the palm pocket under the thumb.
- Fingers rest comfortably on the bottom flight plate, not against the rim.
- Thumb comfortably rests on top.
- Index finger rests against the outside nose of the rim either directly on the parting line of the top/bottom or slightly lower on the rim based on comfort.

FAN GRIP
The fan grip is very similar to the control grip with the exception of the index finger.
- Disc rim rests into the palm pocket under the thumb.
- Fingers rest comfortably on the bottom flight plate, not against the rim.
- Thumb comfortably rests on top.
- Index finger slightly tucks on the underside of the rim.
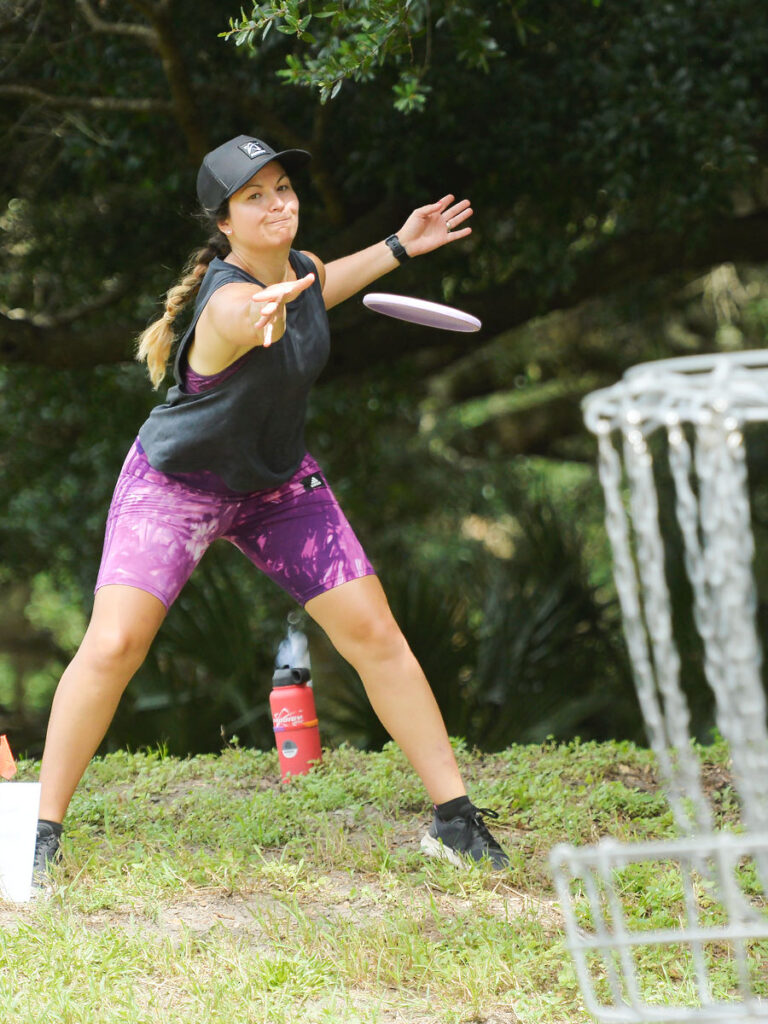
STANCES
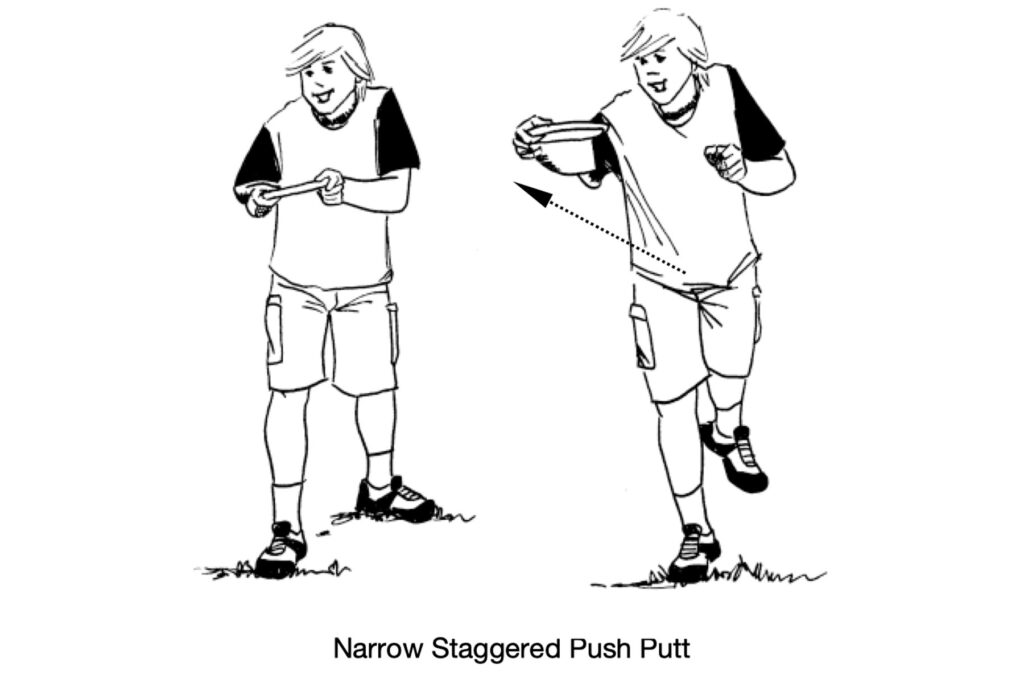
Narrow Staggered / In-Line Stance


Wide Staggered Stance
The narrow staggered or in-line stance features the predominant throwing hand’s foot ahead of the other and pointed directly toward the target. The back foot is much narrower to the front foot and may even be directly behind the front foot if preferred. The foot itself can be anywhere from straight-ahead to a 90-degree angle based on comfort. Having the back foot pointed straight ahead takes some time to get used to, but the result is the push forward comes straight through the hips versus around the hips when the foot is angled. This helps reduce the overall rounding of the body.
The narrow staggered or in-line stance brings the beginning player earlier success since the player’s forward body motion (momentum) contributes to the putting power. This stance is well-suited for longer-range putts and putts on flat ground.


Straddle Stance

Teacher Tip (Elementary) Students should feel stable, comfortable, and relaxed in their stance before initiating their putting motion. Some elementary students may not have the physical strength or motor control to incorporate the above stances with their putting. They may want to spin putt with an adapted approach shot style where their body is at a 90-degree angle from the target. This allows more arm swing to aid in the shot. Accuracy may be lowered, but the disc will get to the target which gives it a chance and avoids frustration until more skills are developed.
Teacher Tip (All Grades) One of the constant form checks throughout putting is that the shoulders and hips are squared to the target. Often times, a player who is consistently missing to the right or left fails to notice their body is not positioned in line with the target, which causes a rounding of the disc. This creates an inside-out or outside in flight that tends to be inconsistent. No matter which stance is chosen, the disc should start from a line below the students’ chin, their heads are up and arms relaxed. Now the students are ready to putt.
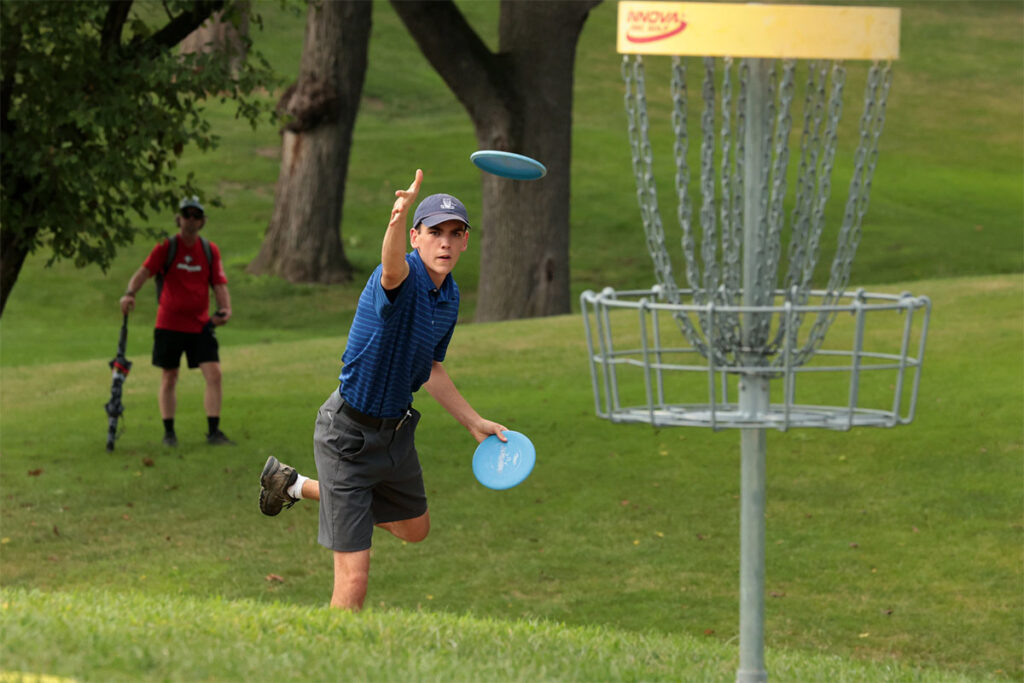
PUTTING STYLES
With bodies balanced and feet firmly planted, it is time to address body positioning or alignment as it relates to putting styles and their related motions.There are three basic putting styles: the Spin Putt, Pitch Putt, and the Push Putt. There are no right and wrong as there are World Champion disc golfers that use each style and have profound success. It is more like each style has advantages and disadvantages. Couple in body type, personal preference, changing conditions, and you might see each style and variations in between during a round or even players switch from one to another depending on circumstance. The main differences between the three styles boil down to arm movement, body motion involved, and amount of spin to carry the disc.
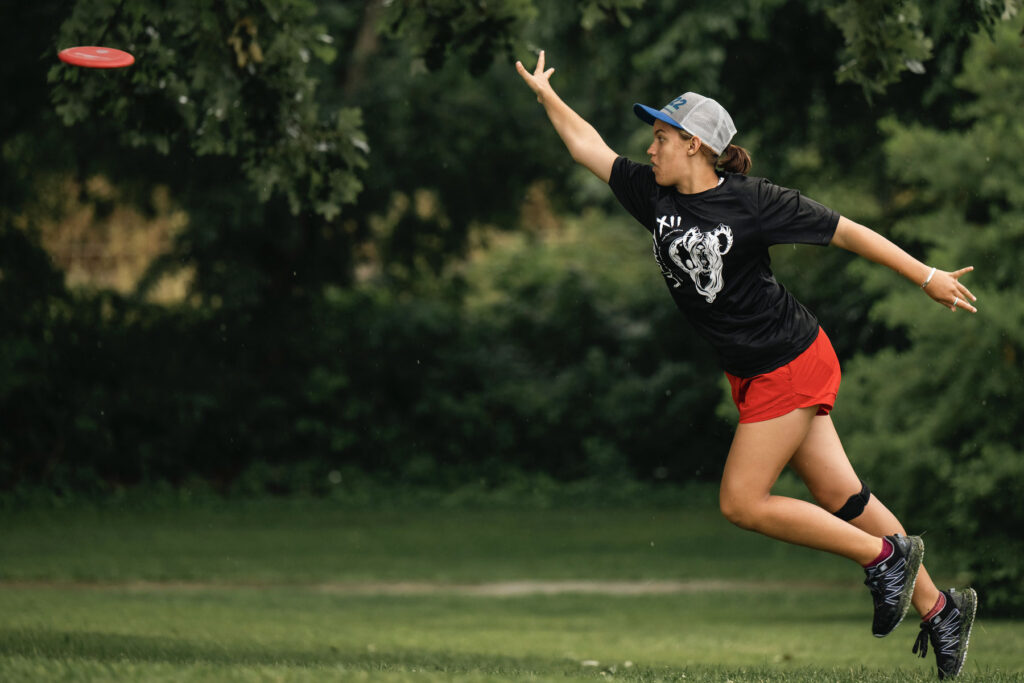
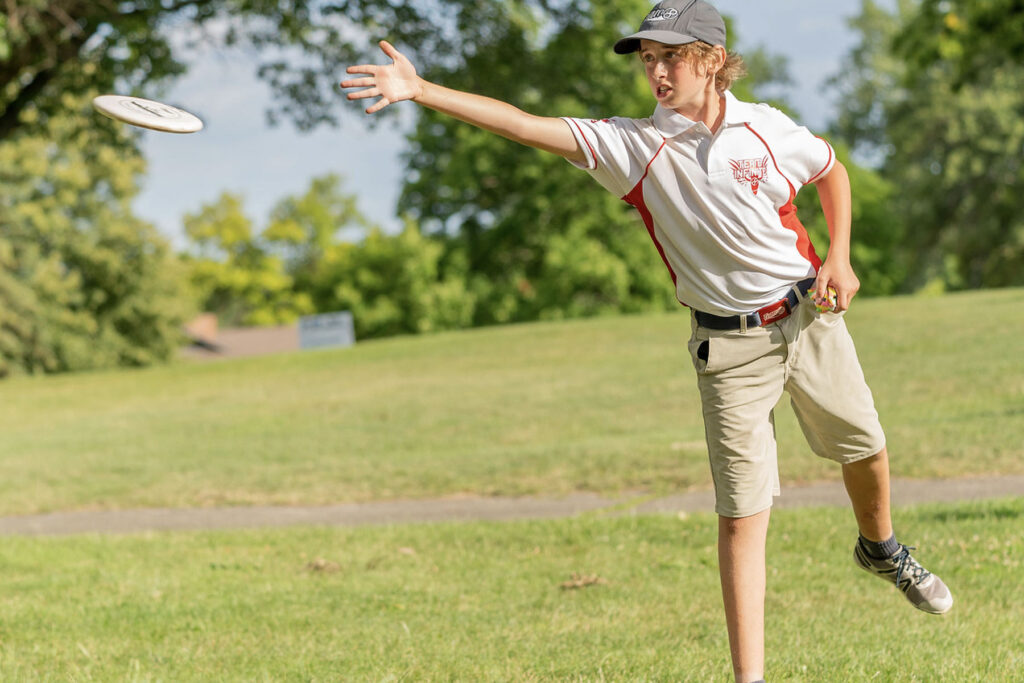
SPIN PUTT
Advantages of Spin Putt
- Easier to learn and teach
- Easier to gauge height and distance because it’s a direct line to the target
- Putts reach the target with ease
- Ideal for longer-range putts, negotiating low-hanging branches, or fighting win
Disadvantages of Spin Putt
- More spin equals more energy and carry creating potential “spit outs” or longer comeback putts
- Harder to control due to many variables that may affect the amount of spin

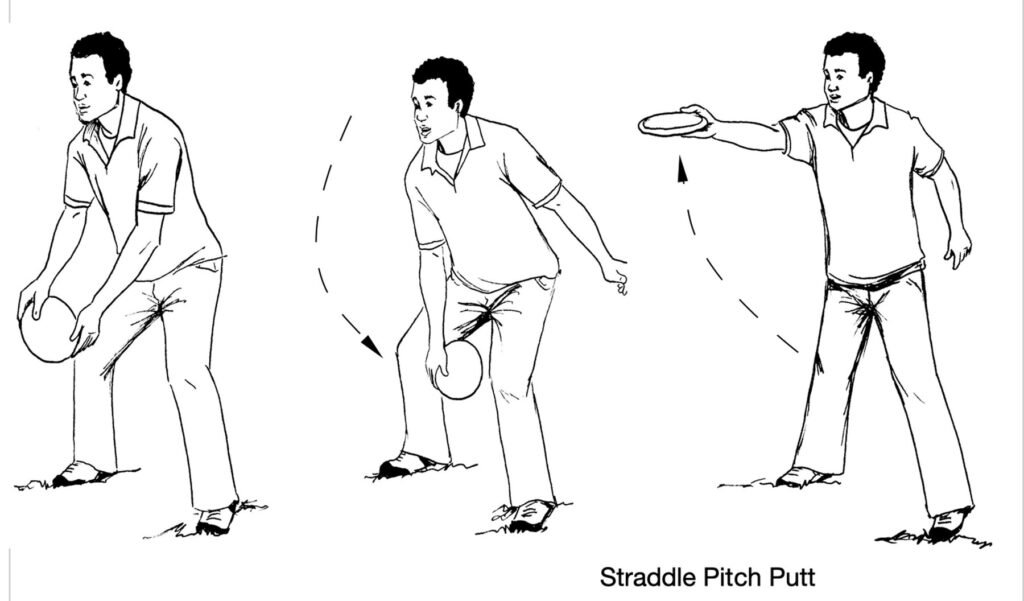
PITCH PUTT
The Pitch Putt may have as much spin as a spin putt, but its motion is almost like tossing horseshoes with discs. The Pitch Putt uses fast upward arm and waist motion to propel the disc in contrast to the straight ahead motion of the Spin Putt. The goal is to control the distance and line of the putt on a vertical plane. The body shifts weight backwards then forward. As the weight shifts backwards, the arm and upper body follow. Think of the movement as a slight forward bend at the waist and legs with the putting arm falling low in rhythm with the bend. When the body shifts its weight forward, the arm starts its movement up and pitches momentum towards the target and into the wrist and fingers that pop the putter out of the hand. The bend and push off in the legs aid in power, but it’s more of the down and upward pitch motion that accelerate this style of putt.
Advantages of Pitch Putt
- Think of the arm movement using a natural pendulum swing
- Easier to control the distance with less spin
- Less spin means shorter comebacks and “spit outs”
- The pitch often features a nose down disc which assists in keeping the disc near target
Disadvantages of Pitch Putt
- Advanced technique to gauge the vertical component
- Misses tend to be high or low
- Harder to control in the wind


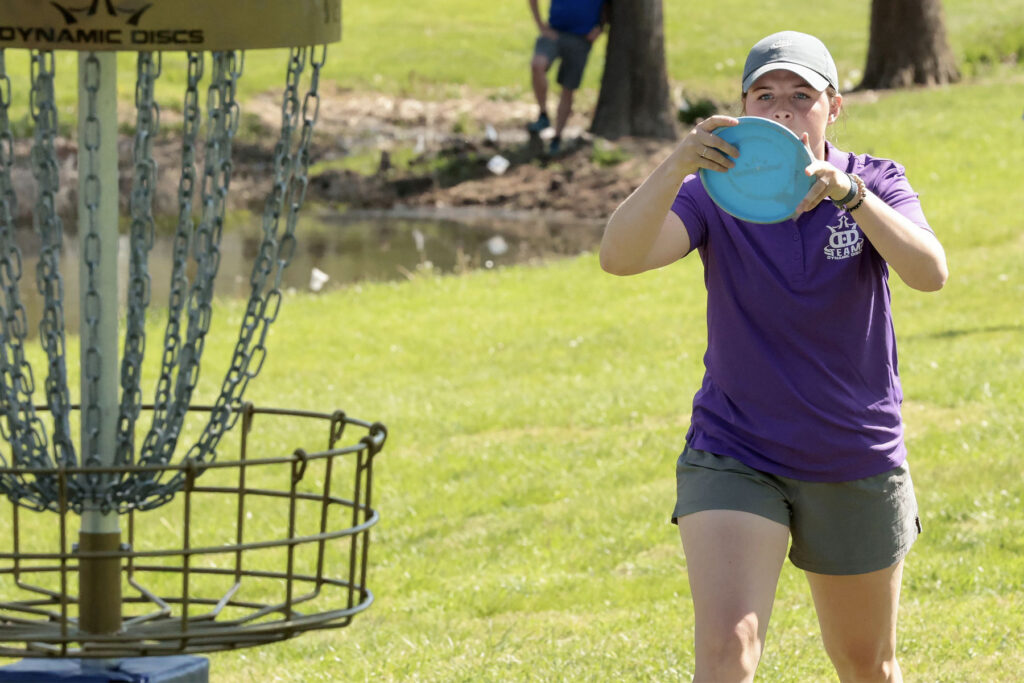
PUSH PUTT
The Push Putt is an advanced style of putt that relies on the larger leg muscles and hips to generate power with just enough spin to get the job done. While all good putters use some weight transfer to initiate a good putt, true Push Putters need to really emphasize the legs to create momentum and position the arm for a push to the target. A lot boils down to the elbow. As body weight is loaded onto the bent back leg, the putting arm is brought naturally to the side of the body bending the elbow inward. As the back leg pushes the body forward, the arm also extends straight through the elbow joint toward the target like pushing open a door. As the elbow and arm straighten out, the acceleration continues with the timed snap of the wrist and springing extension of the fingers that propel the disc on the intended line. Power breakdown is 60% legs, 10% arm, 30% wrist/fingers.
Advantages of Push Putt
- Creates a consistent motion and release point
- Easier to go for longer putts since misses stay close
- Less spin means shorter comebacks and less “spit outs”
Disadvantages of Push Putt
- Advanced technique that takes some time to get used to
- Less spin means tougher in wind conditions
- Lack of spin limits range

Jump / Step Through Putt

PUTTING CONSIDERATIONS
follow through
In all putting styles, the follow through is a key component to successful putting. The term is called “finishing the putt”. If the putt doesn’t finish, the intended line is never achieved making the desired outcome less than guaranteed. To finish the putt, the dominate hand extends forward, toward the target, and fully commits the wrist snap and finger extension through the intended line of release. A general physical reference is to release the putt with the hand extended up and open from chin to nose. The follow mantras that assist in cueing students would be to “shake hands with the chains” or “putt through it, not to it”. A specific pitch putt visual is “painting the pole”. These analogies draw the image to extend and reach out through the target. It is easy to diagnose lack of follow through as the arm and fingers show less than full extension and putts tend to fall short or hit target cage.
A fully committed putt will usually require a back leg counter balance extension in order to maintain body control. This is a natural occurrence that should be encouraged and practiced.

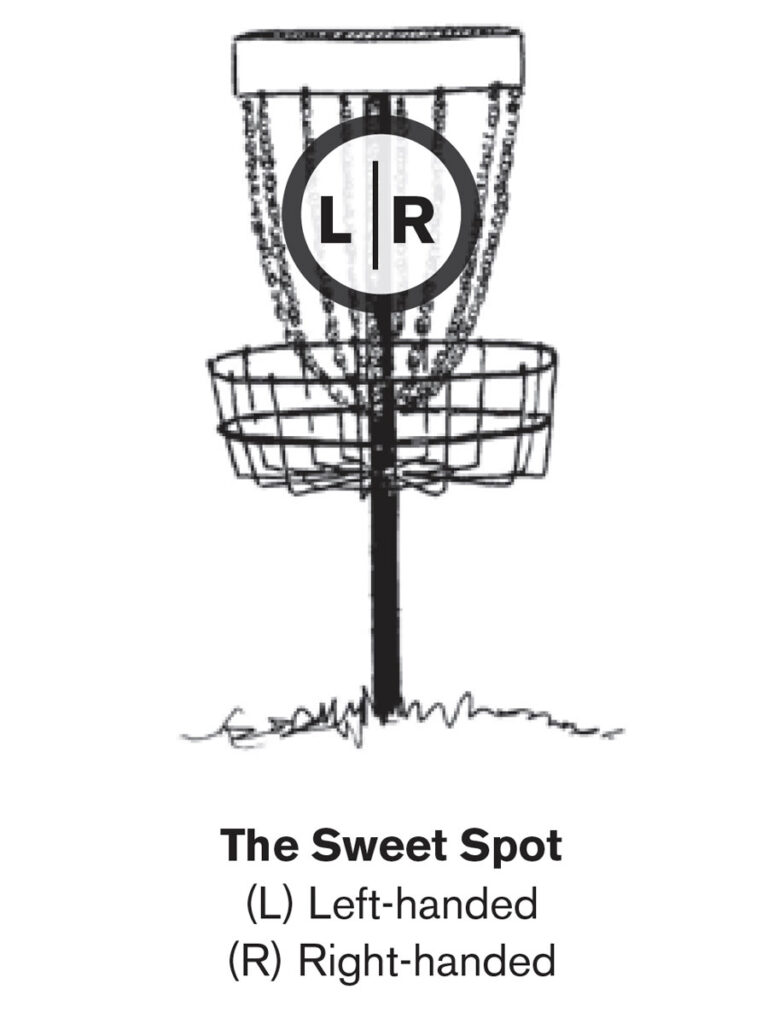
The Sweet Spot / Strong Side
The first order of making a putt is knowing what to aim at. From farther distances, the target is itself is the target. Once a player gets to a range where they feel confident, it is important to start narrowing the focal Sweet Spot based on science and spin. A (RHBH) right-handed thrower’s eyes should be fixed on a single chain link close to right of the pole and about three quarters up the chains. The (LHBH) left-handed thrower aims to the left side of the pole and three quarters up the chains. The reason being, all thrown discs for (RHBH) right-handed students fade from right to left due to the clockwise spin. By aiming at the “sweet spot”, the student is trying to have the putt hit the greatest amount of chain surface area to absorb the disc’s momentum and land in the bottom of the target. By the RHBH player hitting the right side sweet spot or Strong Side, the disc’s natural clockwise rotation spins toward the center pole and catches more chains. That same spin when hit on the left or weak side keeps moving left and misses a series of chains to grab. Hitting the weak side greatly reduces the chances of a strong putt staying in the target.
Wind
Wind can be the golf discs best friend and aid in flight and distance or its worst enemy and take the disc on unintended adventures. The key is to understand wind and how it affects the disc in order to use the wind to one’s advantage. For putting, in general, a head wind tends to lift the putt so lowering and centering your focal point and putt will help. Tailwinds tend to drop the disc. Putting the disc with a higher than regular release point accounts for the extra air space needed for the tailwind drop. The higher release point allows the disc to drop into the target because the drop was accounted for.
Imagery
Putting is an acquired skill through trial, error, and adjustment. The student must adjust their stance, alignment, body and arm movements, focus and follow through until they find what works for them. The idea is to conform to a style that allows for consistency. Kinesthetic imagery is a great way to allow the players/students to “feel” what is happening rather than by watching. The ability to memorize and learn the proper technique by feeling has a far greater impact than the feedback of just watching the disc land in the target and knowing you did something correctly.
From the perspective of the pre-shot, the focus should be on the throw not the result. Eliminating the consequences of a miss reduces the pressure of the shot. During the throw, the focus should be entirely on the feel of the disc. This kinesthetic imagery aids concentration as it provides a central focus and it reduces pressure by blocking out negative or distracting thoughts. The player is allowed to focus on the one thing that really matters during the shot – What’s happening to the disc?
Focus
A good putting performance is dependent on the proficiency to analyze the given task at hand. The proficient putter is able to focus on pertinent cues and disregard distractions. It is important to realize focus cannot be forced. Focus is effortless. The easiest way to regain focus is to step away and take a deep breath. Highly effective putting comes with a connection to an established routine. A deep breath before the putting routine is an excellent centering tool.
Putting Fundamentals Outline
- Putting Fundamentals Outline
I. Introduction to Putting
- The most important component of disc golf fundamentals
- Putting is the great leveler
- Become familiar with all stances and styles…make one your “go to”
- Be consistent with “short range” putts
- Putting styles can and will vary based on situation and personal comfort
II. Grips
- Fingers rest on the underside of the disc, not against the rim
- Disc into palm, thumb comfortable on top
- Control Grip-Index finger rests on outside of rim
- Fan Grip-Index finger tucks under rim
III. Putting Stances
- Narrow Staggered / In-Line Stance
- Throwing hand’s foot is forward, pointed to target
- Back foot behind front almost or directly in line with front foot
- Easy rocking style weight transfer, early success
- Wide Staggered Stance
- Throwing hand’s foot is forward, pointed to target
- Back foot dropped back in a wider comfortable staggered position
- Strong foundation, favored for pitch putt style
- Straddle Stance
- Feet are parallel with each other, shoulder-width apart or wider
- Requires vertical push out of legs and extra wrist pop, advanced skill
- Favored stance to negotiate obstacles or for hillside putts
IV. Putting Style
Spin Putt
- Arm and hand movement is a “shooing flies” motion extended through the target
- Weight shifts back and arm/wrist curls into the chest, then back out with snap
- Easy to teach, has greater putting range, misses carry farther
Pitch Putt
- Arm motion like pitching horseshoes
- Weight shifts forward, arm extends forward and upward, movement like a pendulum
- Putts positively tend toward nose down into the target, misses stay close
Push Putt
- Arm motion like pushing a door open
- With the elbow bent inward to side, big push out of back leg swings arm naturally forward
- Misses stay close to target, advanced style, but very consistent, putting range decreases
Jump / Step Through Putt
- Beyond 10 meters player may extend past or step through their lie
- Extends range of putt due to the added propulsion of forward extension
- Release point slightly higher to assist the loft to length of putt ratio
Putting Considerations
- Follow Through Putt through the target, snap wrist, pop the fingers, counter balance leg kick
- Sweet Spot Takes advantage of natural disc spin and fade. Right Side is Strong Side (RHBH)
- Wind Doesn’t have to be intimidating if understood, requires extra concentration and effort
- Headwinds tend to lift putts. Lower and center focal point, added spin and commitment
- Tailwinds tend to drop putts. Putting with a higher release assists in playing the drop
- Imagery See it, Feel it, Be it. Imagine what needs to happen. Feel yourself make that happen.
- Focus Establish a routine, deep breath-clear head, focus is effortless